You are starting to build confidence in your arduinoing capabilities now aren't you? Gives you satisfaction to know that you are really progressing in something doesn't it? Right! So that's why I'm here with a new tutorial which will show you how to interface an LCD with your arduino. Although it involves some amount of soldering and wiring, it's still a fairly easy concept to grasp. Once you get the theory behind how an LCD module is connected, you will have no difficulty in remembering how to connect it the next time you want to use it. So let's get started shall we?

Okay so first off, I'm going to list out the function of each pin of the LCD module.
Each LCD has 16 pins of which we will be using 12 today.
VCC - Ground Voltage
VDD - +5V
RS - Register Select controls where in the LCD's memory the data is being written.
R/W - Read/Write, enables reading or writing mode
E - Enables writing to the registors
D0-8 - Data Transfer buses
Vo - Controls the Contrast
A and K control the LED backlight.
Wiring the LCD to the Arduino Via a Breadboard
Wire up the circuit according to the figure given below (courtesy : www.arduino.cc ).

Software for Reading and Writing Data from and to the LCD
The following code will allow you to enable the serial function of the arduino to communicate with it and consequently to give instructions to it to control the LCD module.
#include <LiquidCrystal.h>
// LiquidCrystal display with:
// rs on pin 12
// rw on pin 11
// enable on pin 10
// d4-7 on pins 5-2
LiquidCrystal lcd(12, 11, 10, 5, 4, 3, 2);
void setup()
{
Serial.begin(9600);
lcd.begin(16, 2);
lcd.clear();
lcd.setCursor(0,0);
lcd.print("It Works!");
lcd.setCursor(0,1);
lcd.print("Rules");
}
void loop()
{
if (Serial.available())
{
char ch = Serial.read();
if (ch == '#')
{
lcd.clear();
}
else if (ch == '/')
{
lcd.setCursor(0,1);
}
else
{
lcd.write(ch);
}
}
}
Now upload the code to the board, open the Serial Monitor from the console and enter some text to try it out!
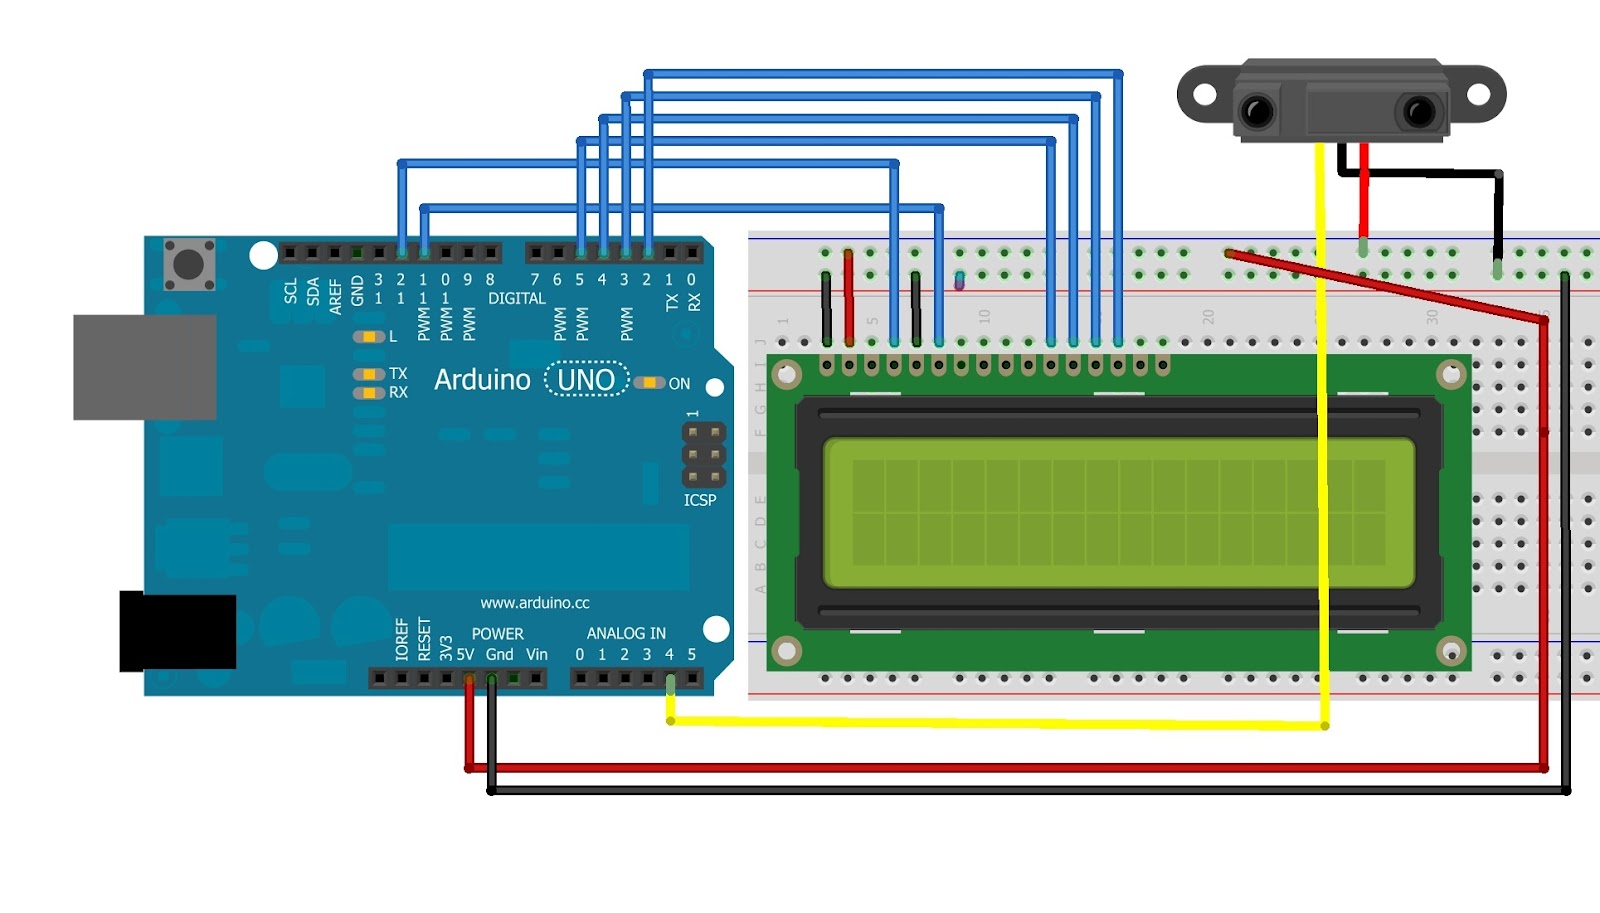
Next I will use an IR ranger sensor to measure the distance of an object and print the values to the LCD. This is a little more complex code and function, so I suggest that before reading this tutorial, you read my tutorial on working with IR sensors.
Okay, now hook up the LCD module according to the instructions above but add the IR sensor on the analog pin 4 so that the whole circuit looks like this:
Now this is the code for the assembled hardware.
#include <LiquidCrystal.h>
// LiquidCrystal display with:
// rs on pin 12
// rw on pin 11
// enable on pin 10
// d4-7 on pins 5-2
LiquidCrystal lcd(12, 11, 10, 5, 4, 3, 2);
int irPin = 4;
void setup()
{
lcd.begin(16, 2);
lcd.clear();
pinMode(irPin, INPUT);
}
void loop()
{
float volt = analogRead(irPin)*0.0048828125;
float val = 65*pow(volt, -1.10);
lcd.print(val);
delay(100);
}
The code in loop is the program is for the displaying the actual distance of the obstacle, rather than the analog values of the Sharp IR sensor. To get an explanation for how it works, you can go to this link. (I'm too lazy to explain the whole process!) or if you do not want to get the distance, only the analog values then you can replace this:
float volt = analogRead(irPin)*0.0048828125;
float val = 65*pow(volt, -1.10);
lcd.print(val);
delay(100);
by this:
val = analogRead(irPin);
lcd.print(val);
delay(100);
Like this project, you can build others like a digital thermometer! Or for that matter any project that involves analog values. Don't take any guidance on that, first try it yourself.
Have fun with your new project and needless to say, whenever in doubt just comment on the post, mail me or google it!!
Cheers! :)


0 comments:
Post a Comment
Do Comment on Anything you like or dont like!